Basic HTML guide
To create a web page The first thing you have to learn is HTML, which is the standard markup language for creating web pages.
Hello there! Let's learn about some important sorts of HTML tags and when to use them, with explanations and examples.
Structure of a HTML document
<!DOCTYPE html>
<html>
<head>
<title>Structure of an HTML document</title>
</head>
<body>
<h1>It's fun to learn about HTML</h1>
</body>
</html>
Explanation:
- The
<!DOCTYPE html>is a declaration that tells the browser that this document is an HTML5 document. - The
<html>element is the root element of an HTML page. - The
<head>element contains all the information about the HTML page. - The
<title>element defines the title of the HTML page and shows the title in the browser's title bar - The
<body>element contains all the visible contents on the page. - The
<h1>element defines the heading(large heading).
Text and Lists
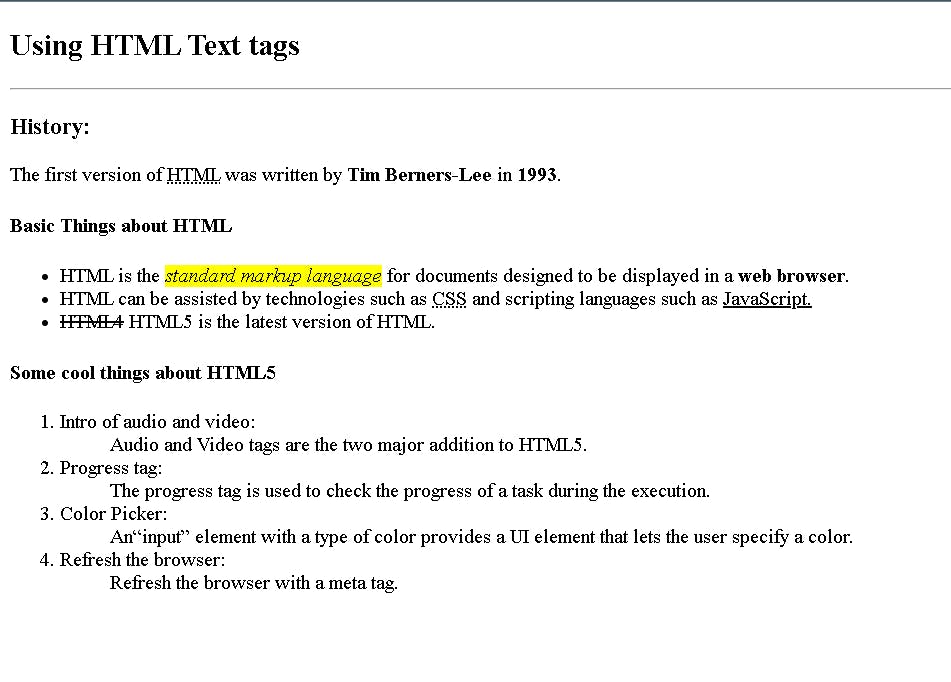
Example using Text tags:
<!DOCTYPE html>
<html lang="en">
  <head>
    <title>Text Tags</title>
  </head>
  <body>
    <h2>Using HTML Text tags</h2>
    <hr />
    <h3>History:</h3>
    <p>The first version of <abbr title="HyperText Markup Language">HTML</abbr> was written by <b>Tim Berners-Lee</b> in <b>1993</b>.</p>

    <h4>Basic Things about HTML</h4>

    <ul>
      <li>
        HTML is the <em><mark>standard markup language</mark></em> for documents designed to be displayed in a <strong>web browser</strong>.
      </li>
      <li>
        HTML can be assisted by technologies such as <abbr title="Cascading Style Sheets">CSS</abbr>and scripting languages such as <u>JavaScript.</u>
      </li>
      <li><del>HTML4</del> HTML5 is the latest version of HTML.</li>
    </ul>
    <h4>Some cool things about HTML5</h4>
    <ol>
      <li>Intro of audio and video:</li>
      <dd>Audio and Video tags are the two major addition to HTML5.</dd>
      <li>Progress tag:</li>
      <dd>The progress tag is used to check the progress of a task during the execution.</dd>
      <li>Color Picker:</li>
      <dd>An<q>input</q> element with a type of color provides a UI element that lets the user specifies a color.
      </dd>
      <li>Refresh the browser:</li>
      <dd>Refresh the browser with a meta tag.</dd>
    </ol>
  </body>
</html>
This is what the above code looks like-

Tags to use for Texts
| Tag | Description |
|---|---|
<h1>-<h6> |
Text headings in 6 different size(big to small) |
<p> |
Creates paragraph |
<br> |
Creates a Line break |
<hr> |
Creates a Horizontal line |
<b> |
Indicates a bold text |
<strong> |
Indicates a Important text |
<i> |
Indicates a Italic text |
<em> |
Indicates a Emphasized text |
<mark> |
Indicates a Marked text |
<small> |
Indicates a Smaller text |
<del> |
Indicates a Deleted text |
<ins> |
Indicates a Inserted text |
<sub> |
Indicates a Subscript text |
<sup> |
Indicates a Superscript text |
|
Creates Space |
< , gt; |
less and greater than symbols |
<abbr> |
Defines an abbreviation |
<q> |
Defines a short quotation |
<blockquote> |
Defines a long quotation |
Tags to use for lists
| Tag | Description |
|---|---|
<ul> |
Defines an unorderd list |
<ol> |
Defines an orderd list |
<li> |
Defines a list item (used in <ol> and <ul> elements) |
<dl> |
Defines a description list |
<dt> |
To add a term to <dl> element |
<dd> |
To add a description of the term to <dl> element |
Create tables
Example for HTML table
<!DOCTYPE html>
<html>
<style>
table, th, td {
  border:1px solid black;
}
</style>
<body>

<h2>A basic HTML table</h2>

<table style="width:100%">
  <tr>
    <th>Movie Name</th>
    <th>Release Year</th>

  </tr>
   <tr>
    <td>Zootopia</td>
    <td>2015</td>
  </tr>
  <tr>
    <td>Inside Out</td>
    <td>2016</td>
  </tr>
  <tr>
    <td>Cloudy with a Chance of Meatballs
</td>
    <td>2009</td>
  </tr>
</table>

</body>
</html>
This is what the above code looks like-

Tags to use for Tables
| Tag | Description | |
|---|---|---|
<table> |
Creates a Table | |
<tr> |
Defines a row in a table | |
<th> |
Defines a header cell in a table | |
<td> |
Defines a cell in a table | |
<caption> |
Adds a caption to the table | |
<colgroup> |
To create one or more columns in a table | |
<col> |
To create properties for one or more columns in a table | |
<thead> |
Creates a table header that can style all header cells | |
<tbody> |
Creates a table body that can style all data cells | |
<tfoot> |
Creates a table footer that can style all footer cells |
Add Images and Links
Example using image and link tags:
<!DOCTYPE html>
<html>
  <head>
    <link rel="icon" href="images/html.png" type="image/x-icon" />
    <style>
      * {
        box-sizing: border-box;
      }

      .column {
        float: left;
        width: 33.33%;
        padding: 5px;
      }

      /* Clearfix (clear floats) */
      .row::after {
        content: "";
        clear: both;
        display: table;
      }
    </style>
  </head>
  <body>
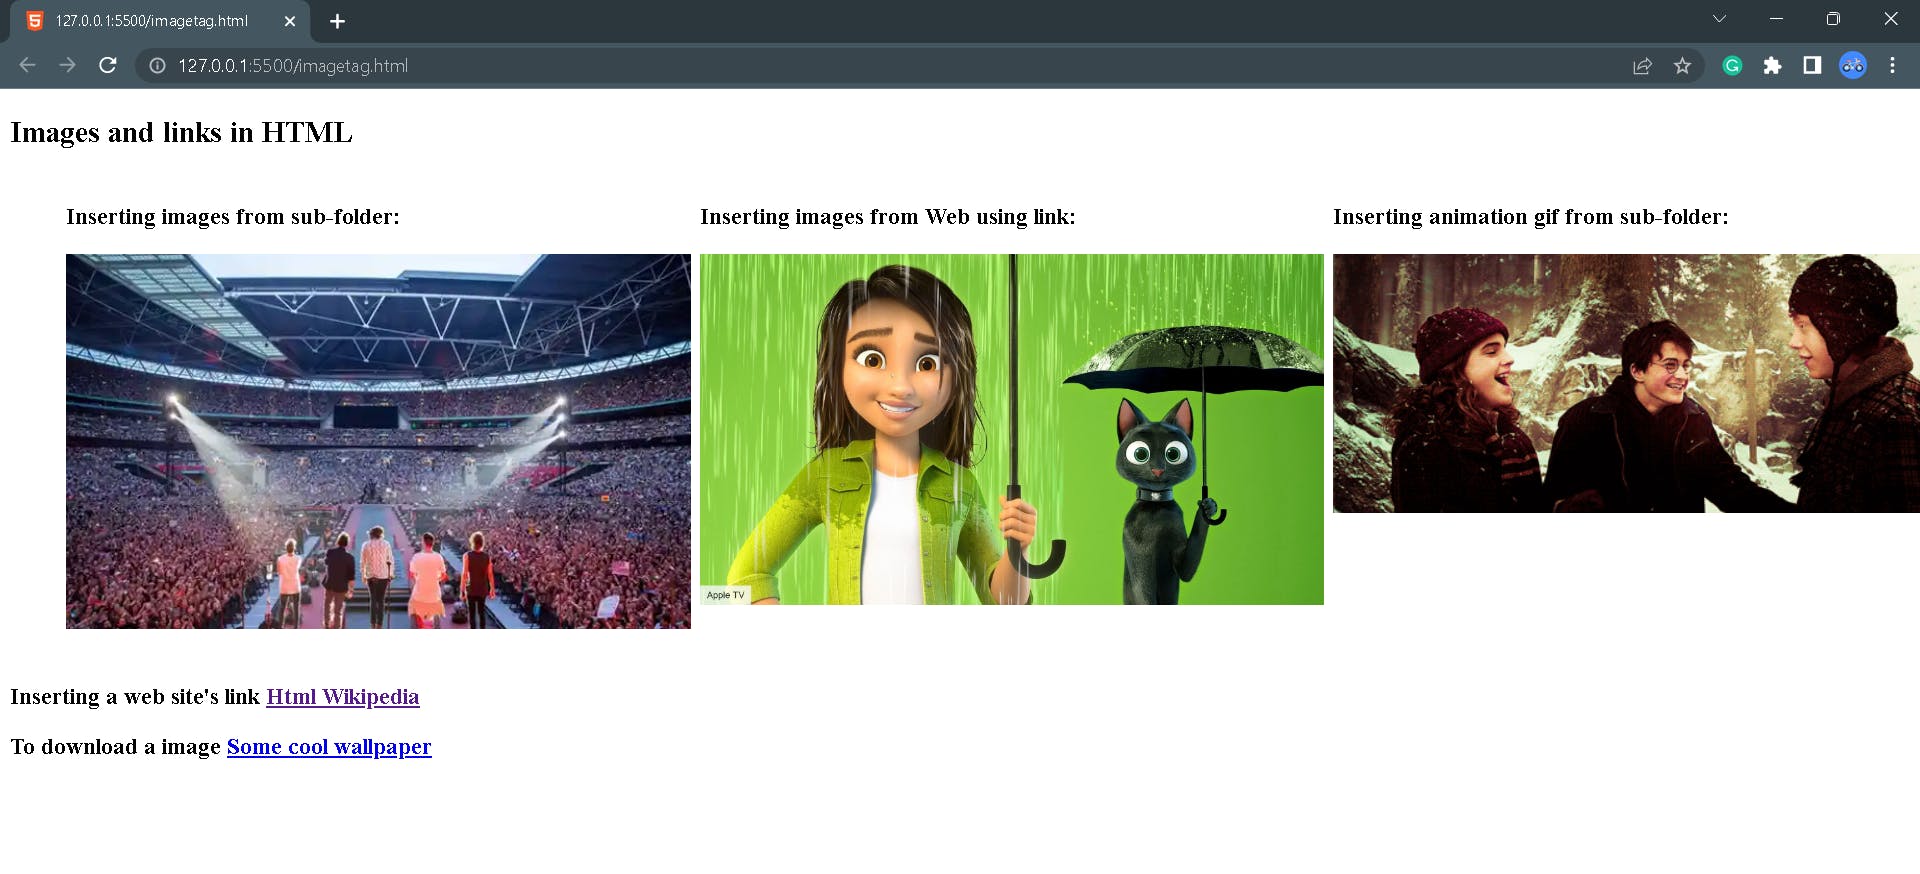
    <h2>Images and links in HTML</h2>
    <div class="row">
      <div class="column">
        <figure>
          <figcaption><h3>Inserting images from sub-folder:</h3></figcaption>
          <img src="images/oned.jpg" alt="OneD tour image" width="120%" />
        </figure>
      </div>

      <div class="column">
        <figure>
          <figcaption>
            <h3>Inserting images from Web using link:</h3>
          </figcaption>
          <img
            src="https://www.thedigitalfix.com/wp-content/sites/thedigitalfix/2022/08/luck-movie.jpg"
            alt="luck movie"
            width="120%"
          />
        </figure>
      </div>
      <div class="column">
        <figure>
          <figcaption>
            <h3>Inserting animation gif from sub-folder:</h3>
          </figcaption>
          <img src="images/hp.gif" alt="Harry Potter" width="120%" /><br />
        </figure>
      </div>
    </div>
    <h3>
      Inserting a web site's link
      <a href="https://en.wikipedia.org/wiki/HTML">Html Wikipedia</a>
    </h3>

    <h3>
      To download a image
      <a href="images/manplane.jpg" download>Some cool wallpaper</a>
    </h3>
  </body>
</html>
This is what the above code looks like-

Tags to use for images and links
| Tag | Description |
|---|---|
<img> |
To insert an image in the web page |
<src> |
It is used to specify the path to the image |
<alt> |
It provides an alternate text for the image if that image is not able to view |
<width> <height> |
These are used to specify the width and height of the image |
<a href> |
It is used to define a hyperlink |
<figure> |
It is used to specify self-contained content, like illustrations, diagrams, photos, code listings, etc. |
<figcaption> |
To add caption for <figure> element |
Forms and Inputs
Example for HTML form:
<!DOCTYPE html>
<html>
  <body>
    <h2>HTML Forms</h2>

    <fieldset style="background: #f6f8ff; border: 2px solid #4238ca">
      <legend>Registration Form</legend>

      <input
        type="text"
        placeholder="First name"
        name="firstname"
      /><br /><br />
      <input type="text" placeholder="Last name" name="lastname" /><br /><br />
      <input type="text" placeholder="Email" name="email" /><br />

      <select name="gender">
        <option value="">-- Select Gender --</option>
        <option value="male">Male</option>
        <option value="female">Female</option>
        <option value="other">Other</option></select
      ><br />

      <input type="submit" value="Submit" />
    </fieldset>
  </body>
</html>
This is what the above code looks like-

Tags to use for forms
| Tag | Description | |
|---|---|---|
<form> |
Defines an HTML form | |
<input> |
Creates input field to enter data | |
<label> |
To represent a caption for the input | |
<select> |
Defines a drop down list | |
<textarea> |
Defines a input field with given number of lines | |
<button> |
Creates a clickable button | |
<option> |
Creates an option to select | |
<fieldset> |
To group related elements in a box | |
<legend> |
Defines a caption for the <fieldset> element | |
<outgroup> |
Used to group related options in the <select> element into Categories |
